In the world of beauty, trends often come full circle, and nail art is no exception. Vintage styles evoke nostalgia and charm, allowing wearers to express their personality through unique and creative designs. Retro-inspired nail art captures the essence of bygone eras, drawing inspiration from the colorful aesthetics of the 1920s through the 1990s. Whether you are a fan of the art deco sophistication, the playful patterns of the 1960s, or the vibrant colors of the 1980s, there is a vintage style to suit every taste. In this comprehensive guide, we will delve into various retro-inspired nail art ideas, techniques, and tips to help you achieve the perfect vintage vibe.
Vintage nail art offers an opportunity to express individuality while tapping into the sentimental appeal of the past. Here are a few reasons why vintage styles continue to captivate nail enthusiasts:
Many vintage designs evoke feelings of nostalgia, allowing individuals to connect with eras they admire. Nostalgic elements can transport you back in time, creating a unique emotional connection.
Vintage styles often feature intricate details, allowing for artistic expression and creativity. From elaborate patterns to playful colors, vintage nail art can showcase unique combinations.
Classic vintage designs have a timeless quality that can be adapted to fit modern aesthetics. Certain styles never go out of fashion, making them versatile for various occasions.
Retro-inspired nail art allows individuals to stand out with unique designs that reflect their personality. Embracing vintage vibes can set you apart and create a memorable impression.
With a rich history of fashion and art, vintage styles provide a colorful palette of inspiration. From the intricate patterns of the 1920s to the bold colors of the 1980s, there is no shortage of ideas to explore.

Before diving into vintage nail art, it is crucial to gather the right tools and products. Having the appropriate supplies will enhance your nail art experience and results.
Nail Polishes: Invest in a variety of colors, including creams, pastels, and vibrant shades, to accommodate different vintage styles. Look for both glossy and matte finishes.
Base Coat: A high-quality base coat is vital for protecting your natural nails and ensuring better polish adhesion.
Top Coat: A good top coat enhances the longevity of your manicure and adds shine, keeping your designs looking fresh.
Nail Art Brushes: A selection of fine-tipped brushes is essential for precision work, while wider brushes are useful for base application.
Dotting Tools: These tools are perfect for creating dots and small shapes, allowing for intricate designs.
Striping Tape: This thin tape can be used to create straight lines and geometric patterns, essential for many vintage styles.
Makeup Sponges: Sponges are helpful for creating blended or ombre effects, common in various eras.
Nail Stamping Kits: Nail stamping allows for quick application of detailed designs and patterns.
Tweezers: Helpful for picking up small decorative elements, such as rhinestones or stickers.
Cotton Pads and Acetone: For cleanup and correcting mistakes, these are essential tools to have on hand.
Nail Polish Remover: A gentle, acetone-free remover helps keep nails healthy without excessive drying.
Cuticle Oil: Regularly using cuticle oil will keep your cuticles moisturized and promote healthy nail growth.
Nail File and Buffer: Shaping and buffing your nails creates a neat canvas for your vintage designs.
To achieve beautiful vintage nail art, proper preparation is vital. Follow these steps to get your nails ready:
Begin by washing your hands thoroughly and removing any old nail polish. Clean nails provide a better surface for application.
Using a nail clipper, trim your nails to your desired length. Then, file them into your preferred shape, whether it's square, almond, or round.
Gently push back your cuticles using a cuticle pusher. This step helps create a clean edge around your nails.
Lightly buff the surface of your nails to create a smooth canvas. This will help the polish adhere better.
Finish preparing your nails with a thin layer of base coat. Allow it to dry completely before applying colored polish.
Once your nails are prepped, you can explore various nail art techniques that will help you achieve stunning vintage designs. Below are some popular methods along with step-by-step instructions:
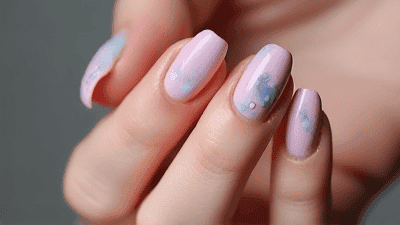
Ombre techniques showcase the blend of two or more shades, making them great for vintage aesthetics. Pastel ombre is particularly popular for a soft vintage vibe.
Dotting is a timeless technique that works well with many vintage styles, from floral designs to polka dots.
Stripes have always been a classic design element in nail art, perfect for achieving a vintage touch, especially in nautical themes.
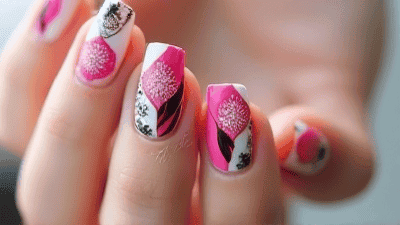
Floral designs are an enduring favorite, especially for capturing the essence of vintage aesthetics.
Nail stamping allows for the rapid application of intricate designs, making it an excellent choice for vintage nail art.
To spark your creativity, here are some vintage-inspired nail art ideas to try:
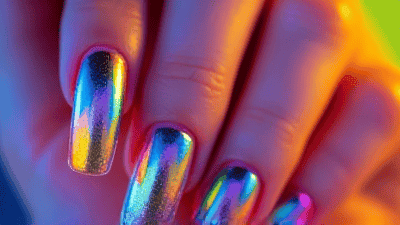
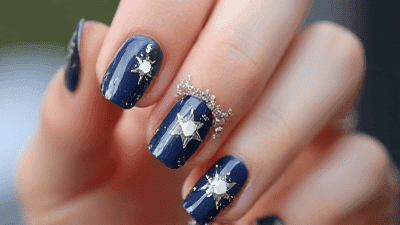
Capture the glamour of the 1920s with art deco patterns and metallic colors.
Floral patterns were prevalent in past decades, making them perfect for vintage nail art.
Polka dots are a classic style that can easily portray a vintage vibe.
The bohemian aesthetic of the 1970s can inspire fun, colorful, and laid-back nail art.
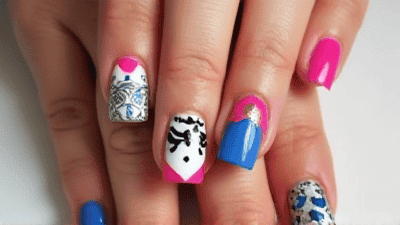
Embrace bold, bright colors and fun shapes that defined the 1980s nail art scene.
This timeless style can be enhanced with vintage colors and softer shapes.
Even experienced nail artists face challenges. Here are some common issues you might encounter and their solutions:
If your polish appears streaky or uneven, apply thin layers and allow each to dry before adding more color. Shake the bottle gently before use to blend the polish.
To avoid smudging, ensure each layer is completely dry before proceeding. Use a quick-drying top coat for faster results.
If your dotting tool or brushes are not working as expected, ensure they are clean and free from polish buildup. Consider using fresh tools if necessary.
If tape pulls a portion of your polish away, use painter's tape or let your base color dry completely before applying tape. Alternatively, cut the tape into smaller pieces to avoid damage.
Use a fine-tipped brush for better precision. If you make a mistake, use a small brush dipped in nail polish remover to touch up the edges.
Once you've completed your beautiful vintage nail art, here are some tips to help keep your manicure looking fresh and fabulous:
Apply cuticle oil daily to keep your cuticles healthy and moisturized, preventing dryness and cracking.
Wear gloves when using harsh chemicals or doing household chores to protect your nails from damage.
Try to limit your hands' exposure to water for extended periods to prevent chipping and wear.
Reapply a shiny top coat every few days to maintain your manicure's shine and protect against chips.
Allow your nails to rest between manicures. This helps prevent damage and preserves natural nail health.
To further inspire your vintage nail art creations, here are some trendy color combinations to consider:
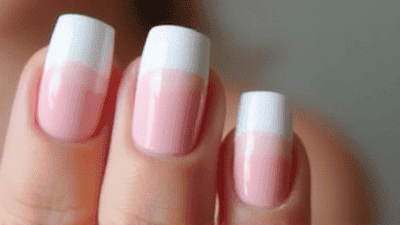
A classic combination that evokes femininity and elegance, perfect for vintage styles.
A charming pairing that captures the innocence of retro aesthetics, great for soft floral designs.
A timeless pairing that adds glamour and sophistication, ideal for vintage elegance.
An earthy combination that brings a bohemian feel, perfect for fall and winter looks.
A muted palette that leans towards modern vintage styles, suitable for year-round wear.
Vintage-inspired nail art is a wonderful way to embrace nostalgia while expressing your individuality. With countless techniques and designs to explore, there is something for everyone in the world of retro nails.
As you experiment with vintage styles, remember that the beauty of nail art lies in creativity and personal expression. Don’t be afraid to mix techniques, colors, and patterns to find what resonates with your unique style.
Gather your tools, let your imagination soar, and create stunning vintage nails that reflect your personality and the artistry of the past. Enjoy every step of the process, and embrace the vintage vibes that will surely turn heads and spark conversations.